Introduction to Mini Pumpkin Pie Cups
If you’re looking for a delightful treat that’s both delicious and health-conscious, let me introduce you to the wonderful world of mini pumpkin pie cups. These little bites of autumn are a fantastic twist on the classic pumpkin pie, and they are perfect for anyone seeking a gluten-free and vegan option. But why do I believe mini pumpkin pie cups are a perfect treat, you may ask? Let’s dive in!
Why Mini Pumpkin Pie Cups Are a Perfect Treat
-
Portion Control: In our fast-paced lives, the last thing we want is to feel guilty about dessert. These mini cups are perfectly portioned, allowing you to indulge without overdoing it.
-
Easy to Make: Cooking can sometimes feel overwhelming, but mini pumpkin pie cups come together in no time. With simple ingredients and straightforward steps, they’re great for both seasoned bakers and novices.
-
Versatile Flavor: Pumpkin is a flavor that many associate with comfort and warmth. It’s packed with nutrients, including vitamin A, fiber, and antioxidants. With a hint of cinnamon and nutmeg, these cups bring a cozy vibe to any occasion, whether it’s a holiday gathering or a cozy night in.
-
Dietary Friendly: These mini cups cater to various dietary needs. They’re vegan, meaning they’re free from animal products, and gluten-free, making them an excellent option for those with dietary sensitivities. You can enjoy a sweet treat without worrying about allergens.
-
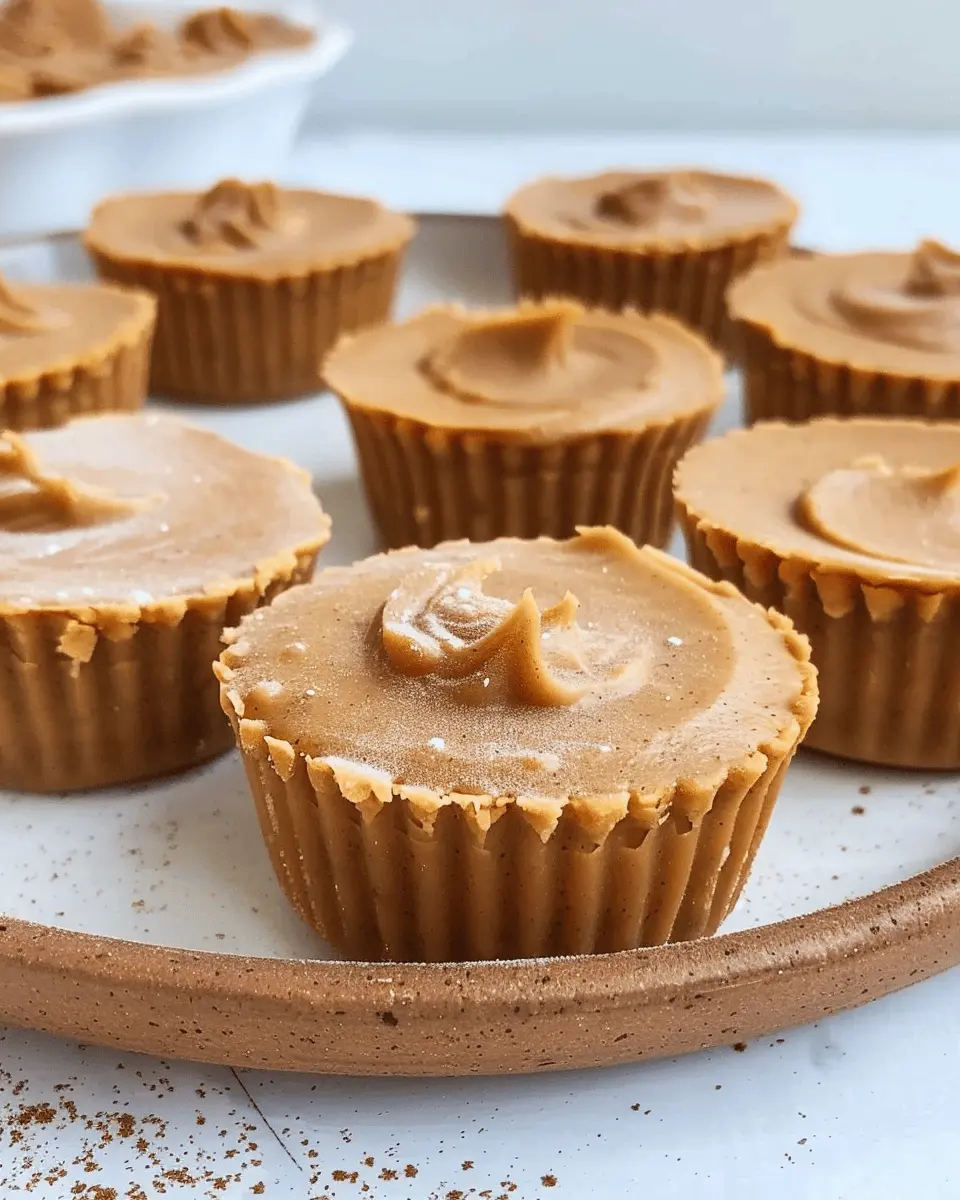
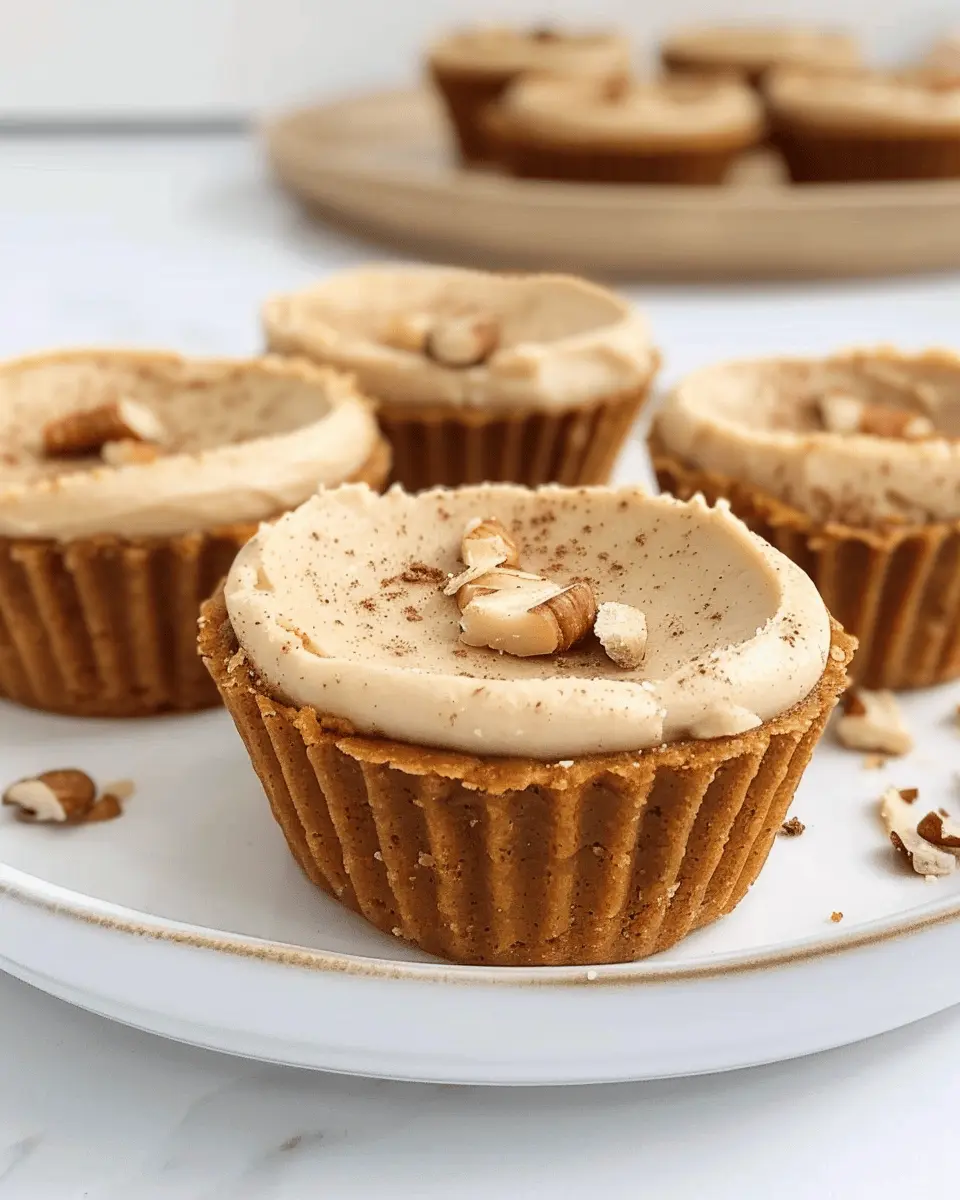
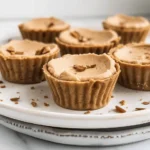
Presentation: Who can resist something that looks as good as it tastes? These mini pumpkin pie cups are visually appealing, making them an eye-catching addition to any dessert table. You can even dress them up with a dollop of whipped coconut cream or a sprinkle of crushed pecans for an extra touch.
So if you’ve ever pondered over what to serve at your next gathering or just want a sweet treat after a long day, consider whipping up a batch of these delightful mini pumpkin pie cups. They’re bound to impress and satisfy everyone at the table while keeping everyone’s dietary preferences in check. For more tips on how to make them, refer to wholesome sources like Healthline or EatingWell for additional inspiration.
Get ready to enjoy a unique twist on a seasonal favorite!
Ingredients for Mini Pumpkin Pie Cups
Essential items for the crust
Creating the perfect foundation for your mini pumpkin pie cups requires just a few simple yet essential ingredients. Here’s what you’ll need:
- Almond flour: This gluten-free option is not only nutritious but also creates a delightful texture.
- Coconut oil: A fantastic plant-based fat that gives your crust a tender, flaky quality.
- Maple syrup: This natural sweetener balances the nutty flavors and adds moisture.
Key ingredients for the pumpkin layer
Now let’s move to that creamy, spiced filling that really makes these mini pumpkin pie cups shine. Essential components include:
- Canned pumpkin puree: Look for high-quality, pure pumpkin for the best flavor. Did you know that pumpkin is packed with nutrients like vitamin A and fiber? That’s a bonus!
- Coconut milk: This adds a rich creaminess without any dairy. It’s also great for achieving that smooth texture.
- Spices: A blend of cinnamon, nutmeg, and ginger will infuse warmth and depth to your filling. You can explore more about the health benefits of these spices here.
With these ingredients, you’re well on your way to impressing your friends with these delightful, plant-based treats!
Preparing Mini Pumpkin Pie Cups
When autumn arrives, there’s nothing quite like the aroma of pumpkin pie wafting through the kitchen. Everyone loves a classic pumpkin pie, but if you’re feeling a little adventurous, why not try making mini pumpkin pie cups? These delightful little desserts are not only gluten-free and vegan, but they’re also super easy to prepare! Let’s walk through the steps together.
Preheat the Oven
Before you start mixing ingredients, it’s important to preheat your oven to 350°F (175°C). Allowing your oven to reach the right temperature ensures that your mini pumpkin pie cups will bake evenly. While it’s warming up, take a moment to gather your ingredients and tools, such as a muffin tin, mixing bowls, and measuring spoons. Having everything prepped will make your cooking experience smoother and more enjoyable.
Make the Crust
The crust of your mini pumpkin pie cups is a vital part of the recipe that adds texture and flavor. For a gluten-free, vegan crust, you’ll need:
- 1 cup almond flour
- 1/2 cup gluten-free oats
- 1/4 cup coconut oil (melted)
- 2 tablespoons maple syrup
- A pinch of salt
In a mixing bowl, combine the almond flour, gluten-free oats, and salt. Then, stir in the melted coconut oil and maple syrup until the mixture is crumbly but holds together when pressed.
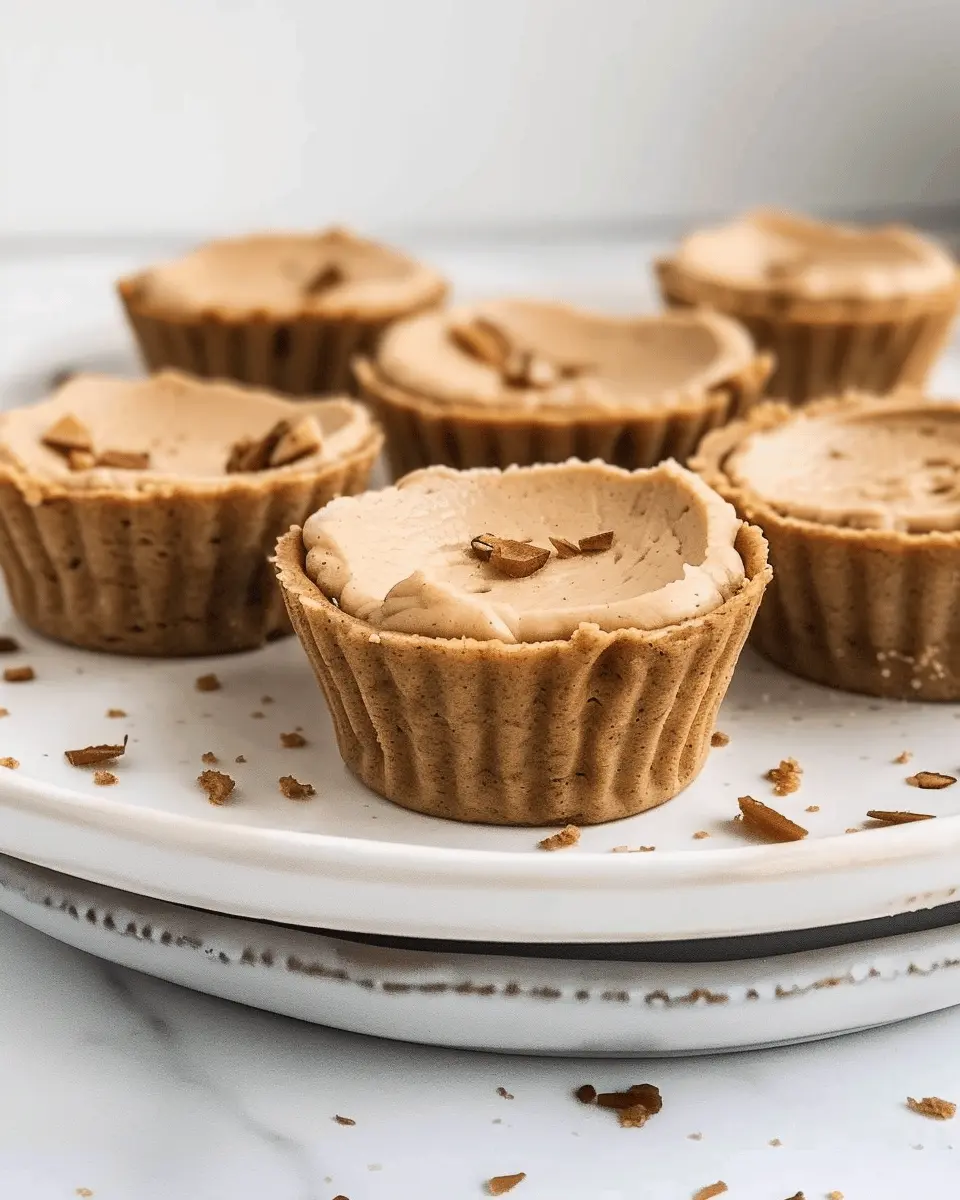
Once your crust ingredients are mixed well, it’s time to mold them into your muffin tin. Grab a tablespoon of the crust mixture and press it into the bottom and slightly up the sides of each muffin cup. This ensures you have a sturdy base to hold the delicious pumpkin filling.
Bake the Crust
Now it’s time to give your crust a quick bake! Place the muffin tin in your preheated oven and bake for about 10 minutes, or until the edges begin to turn golden brown. Keep an eye on them; you want them crispy but not burnt. While the crusts are baking, you can take this time to prep your pumpkin filling.
Prepare the Pumpkin Layer
With the crusts baking, let’s focus on the filling. You’ll need:
- 1 cup canned pumpkin puree (not pumpkin pie filling)
- 1/3 cup non-dairy milk (like almond or coconut)
- 1/4 cup maple syrup
- 2 teaspoons pumpkin pie spice
- 1 teaspoon vanilla extract
In a mixing bowl, combine the pumpkin puree, non-dairy milk, maple syrup, pumpkin pie spice, and vanilla extract. Whisk these ingredients together until you achieve a smooth, creamy consistency. The pumpkin spice blend can be easily made at home if you haven’t picked some up yet — just combine cinnamon, nutmeg, ginger, and allspice for a cozy mix!
Assemble and Freeze
Once your crusts are done baking and cooled slightly, it’s time to fill them with that luscious pumpkin mixture! Carefully pour the pumpkin filling into each crust, filling them nearly to the top. After filling, place the muffin tin into the freezer for about an hour. This will help the filling set nicely.
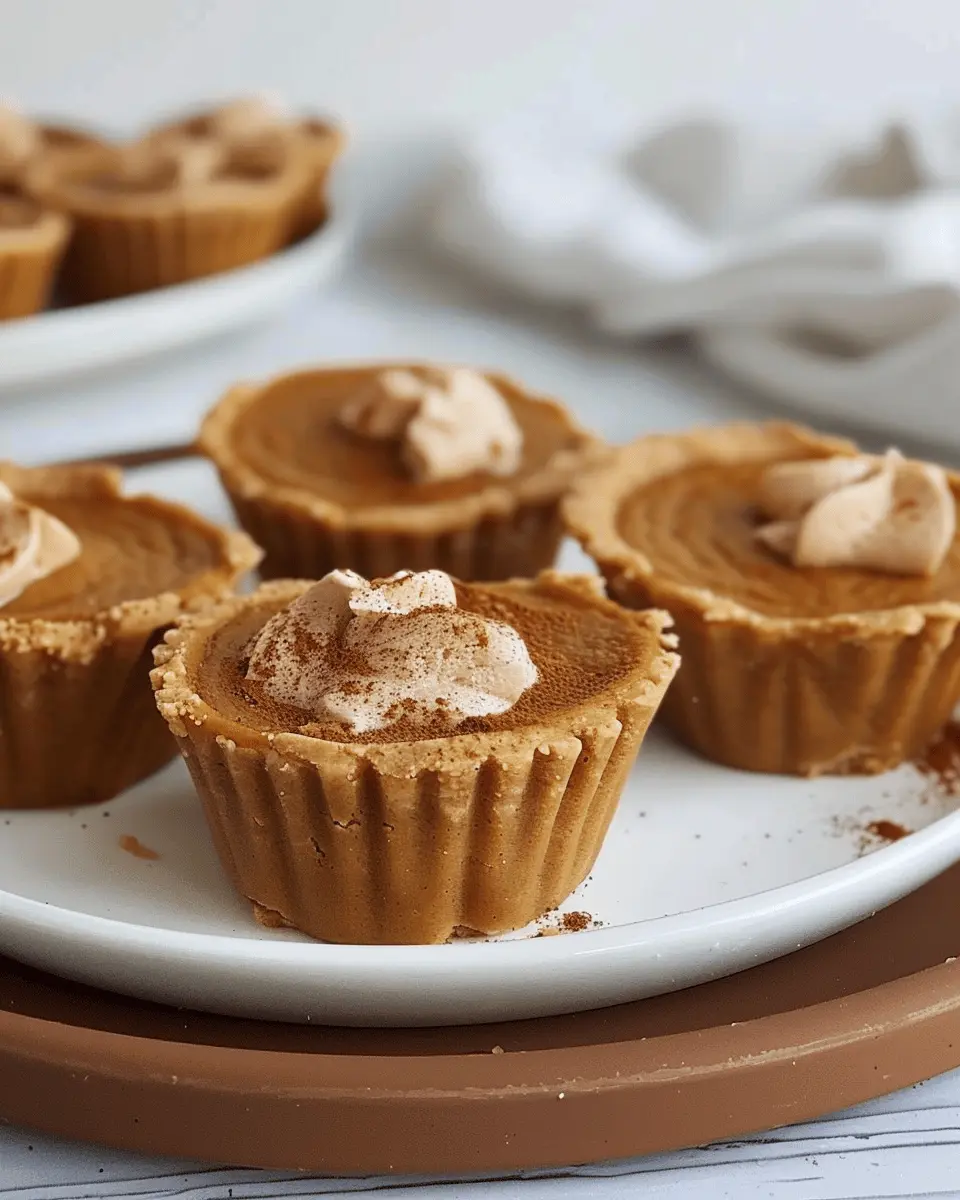
Once they’re firm, feel free to decorate them with a dollop of coconut cream or a sprinkle of crushed nuts. These mini pumpkin pie cups are perfect for sharing at fall gatherings or enjoying as a sweet treat after dinner — or even breakfast, if you’re feeling indulgent!
As you can see, preparing mini pumpkin pie cups is a delightful process that leaves you with a delicious dessert you can feel good about. When making these tasty treats, you’re not just baking; you’re creating wonderful memories in your kitchen. So grab your ingredients and get started — your taste buds will thank you!
Variations on Mini Pumpkin Pie Cups
Creating mini pumpkin pie cups is just the beginning! These tasty treats are so versatile that you can play around with a variety of ingredients, making them your own.
Swap Out for Different Nut Butters
While the classic recipe calls for almond butter, why not try experimenting with different nut butters based on your taste preference? Here are some ideas:
- Cashew Butter: This will give your mini pumpkin pie cups a creamy texture with a slightly sweet flavor.
- Peanut Butter: If you’re looking for a more robust taste, peanut butter will add a delightful nuttiness.
- Sunflower Seed Butter: A fantastic allergy-friendly swap, it offers a unique flavor profile that pairs beautifully with pumpkin.
These changes can elevate the flavor in unexpected ways!
Add a Chocolate Layer
Imagine biting into a mini pumpkin pie cup only to find a luscious layer of chocolate underneath—blissful, isn’t it?
- Simply melt some dairy-free chocolate and pour a thin layer at the bottom of each cup before filling it with your pumpkin mixture.
- This not only adds richness but also contrasts wonderfully with the spices in the pumpkin filling.
For a healthier chocolate option, try using dark chocolate with at least 70% cocoa. Not only does it satisfy your sweet tooth, but it also comes with health benefits, such as antioxidants and improved heart health, according to the American Heart Association.
Feel free to get creative with these variations and turn your succulent mini pumpkin pie cups into something uniquely yours! If you need more inspiration, check out renowned dessert blogs like * Minimalist Baker* or Oh She Glows. Happy baking!
Cooking Tips and Notes for Mini Pumpkin Pie Cups
Importance of Cooling Time
After baking your mini pumpkin pie cups, patience is key. Allow them to cool for at least 30 minutes before serving. This cooling period allows the filling to set properly, giving you that perfect slice without a messy spill. Plus, the flavors meld beautifully when given time to rest. If you’ve ever hastily served a pie only to have it slop around your plate, you know why this step is a must!
Fresh Pumpkin vs. Canned
When it comes to choosing between fresh pumpkin and canned, you have options. Fresh pumpkin can yield a slightly lighter flavor, but it requires more prep time. If you go the fresh route, note that sugar pumpkins are best for baking—they’re sweeter and less watery. For convenience, canned pumpkin (look for pure pumpkin, not pumpkin pie filling) is a fantastic option that saves you time and hassle while still delivering delicious results. For a deep dive into the benefits of each, check out this source.
With these tips in mind, your mini pumpkin pie cups will be a hit at your next gathering!
Serving Suggestions for Mini Pumpkin Pie Cups
Creative toppings
Elevate your mini pumpkin pie cups by experimenting with a variety of toppings. Consider a dollop of coconut whipped cream for a delightful creamy texture that complements the spiced filling beautifully. You could also add a sprinkle of toasted pecans or walnuts for a crunchy contrast that adds depth to every bite. For those who appreciate a hint of decadence, a drizzle of maple syrup or a sprinkle of ground cinnamon can enhance those warm autumn flavors.
Get adventurous by incorporating a touch of chocolate shavings—they pair surprisingly well with pumpkin and spice. For a fresh twist, try a slice of fresh pear or apple on top, bringing a fruity element that balances the sweetness.
Pairing with beverages
When it comes to pairing, think warm and cozy! A steaming cup of chai tea or spiced apple cider makes a perfect companion for your mini pumpkin pie cups. Both drinks play off the warming spices in the pies, creating a comforting experience. If you prefer something chilled, opt for a vanilla almond milkshake—its creamy texture and subtle sweetness harmonize wonderfully with the pumpkin flavor.
For a more refreshing option, consider a herbal tea like peppermint or chamomile, which can cleanse the palate beautifully, leaving you ready for another delightful bite. Explore these options to create an inviting atmosphere that showcases your mini treats.
If you’re looking for more serving inspiration, check out this article on Food Network for additional topping and pairing ideas!
Time Breakdown for Mini Pumpkin Pie Cups
Preparation time
Getting started with your mini pumpkin pie cups is a breeze! Prep time takes about 15-20 minutes. This includes gathering all your ingredients and mixing the pie filling. Pro tip: Measure everything out beforehand to make the process even smoother!
Baking time
Once your cups are assembled, it’s time to send them off to the oven. Bake for about 20-25 minutes until the tops are golden and set. The aroma will make your kitchen feel like fall—an experience in itself!
Freezing time
If you want to make a batch ahead of time, these mini pumpkin pie cups freeze beautifully. Allow them to cool completely, then wrap them in plastic wrap and store in an airtight container. They can be frozen for up to 3 months. Simply thaw and reheat for a cozy dessert anytime!
Nutritional Facts for Mini Pumpkin Pie Cups
Calories per cup
When it comes to mini pumpkin pie cups, you’ll be pleased to know they’re a relatively guilt-free indulgence! Each cup contains approximately 150 calories, making them a delightful option for those mindful of their calorie intake while still wanting to savor the fall flavors.
Protein and fiber content
These delectable treats also pack a nutritional punch with about 3 grams of protein and 2 grams of fiber per cup. The fiber helps keep you feeling full longer, while the protein supports overall health. Feel free to use this fiber-rich ingredient for an added nutritional boost!
Sweetener comparison
In these mini pumpkin pie cups, we often opt for natural sweeteners like maple syrup or coconut sugar, which can have a lower glycemic index than traditional sugar. This means you can enjoy the sweetness without a spike in blood sugar levels. Check out this article on healthy sweeteners to explore more about your options!
With these insights, you can enjoy your mini pumpkin pie cups guilt-free, enhancing both your health and holiday spirit!
FAQs about Mini Pumpkin Pie Cups
Can I make these without nut butter?
Absolutely! If you’re looking to dive into mini pumpkin pie cups without nut butter due to allergies or personal preference, there are some great alternatives. Consider using applesauce or mashed bananas as a binder; both can add moisture and a hint of sweetness without the nutty flavor. Also, sunflower seed butter or tahini can serve as nutritious substitutes, providing healthy fats while keeping your treats deliciously vegan.
What’s the best way to store leftovers?
To keep your mini pumpkin pie cups fresh, store them in an airtight container in the refrigerator for up to five days. If you want to prolong their life, you can also freeze them for up to a month. Just make sure to place parchment paper between layers to prevent sticking. When you’re ready to enjoy them, simply thaw in the fridge or let them sit at room temperature for a few minutes for the best texture.
How can I make these cups more festive?
Elevating your mini pumpkin pie cups for celebrations is a breeze! Consider adding a touch of whipped coconut cream on top for an elegant finish. A sprinkle of cinnamon or nutmeg can enhance the fall flavors beautifully. You could even garnish with edible glitter or seasonal sprinkles to really wow your guests. Additionally, serving these delightful treats on a rustic wooden platter or cute cupcake stand can add to the festive vibe.
By pondering over these handy tips and tweaks, you can elevate your mini pumpkin pie cups into the stars of your next gathering. Happy baking!
For more insights on festive baking, check out Baking Ideas or Vegan Recipes for inspiration.
Conclusion on Mini Pumpkin Pie Cups
Final thoughts and encouragement to try the recipe
As you wrap up your culinary adventure, I hope you’re feeling inspired to bring these mini pumpkin pie cups to your next gathering or cozy night in. They’re not only gluten-free and vegan but also bursting with holiday flavors that everyone can enjoy. Plus, their bite-sized format means you can indulge without guilt!
If you’ve never experimented with a pumpkin dessert before, now’s the perfect time to dive in! The combination of creamy filling and a delightful crust is sure to impress your friends and family. So grab your ingredients and let those aromas fill your kitchen—you won’t regret it! For tips on presentation, check out this helpful guide.
Happy baking!
PrintMini Pumpkin Pie Cups: Easy Gluten Free, Vegan Delight for Fall
Delight in these Mini Pumpkin Pie Cups that are both gluten free and vegan, perfect for the fall season!
- Prep Time: 15 minutes
- Cook Time: 25 minutes
- Total Time: 40 minutes
- Yield: 12 mini cups 1x
- Category: dessert
- Method: baking
- Cuisine: American
- Diet: gluten free, vegan
Ingredients
- 1 cup pumpkin puree
- 1/2 cup coconut milk
- 1/4 cup maple syrup
- 1 tsp vanilla extract
- 1 tsp pumpkin spice
- 1/2 tsp salt
- 1 1/2 cups almond flour
- 1/4 cup coconut oil
- 2 tbsp almond milk
Instructions
- Preheat the oven to 350°F (175°C).
- In a mixing bowl, combine pumpkin puree, coconut milk, maple syrup, vanilla extract, pumpkin spice, and salt. Mix well.
- In another bowl, mix almond flour with melted coconut oil and almond milk to create a dough.
- Press the dough into mini muffin tins to form the crust.
- Fill each crust with the pumpkin mixture.
- Bake for 20-25 minutes or until the filling is set.
- Let cool before serving.
Notes
- These cups can be served with coconut whipped cream for extra indulgence.
- Store leftovers in the fridge for up to three days.
Nutrition
- Serving Size: 1 mini cup
- Calories: 150
- Sugar: 5g
- Sodium: 120mg
- Fat: 9g
- Saturated Fat: 6g
- Unsaturated Fat: 3g
- Trans Fat: 0g
- Carbohydrates: 15g
- Fiber: 2g
- Protein: 2g
- Cholesterol: 0mg
Keywords: Mini Pumpkin Pie Cups, Gluten Free, Vegan